Warehouse Master
Warehouse Master
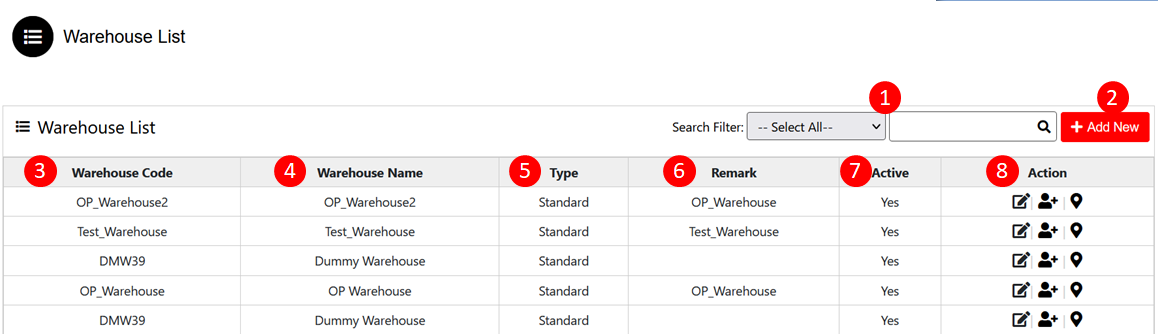
To add a warehouse , use the "Administrator" menu and click the "Warehouse Master" button. This will open the Warehouse list wizard dialog.
The various parts of Warehouse list dialog are:
- Search Filter: Search User by Warehouse Name, warehouse Code, Type.
- Add New: Click on Add New button to add the new Warehouse.
- Warehouse Code: Every Warehouse Code should be unique.
- Warehouse Name: Enter warehouse Name in the Field.
- Type: Specify the type of the Warehouse- Standard, Virtual.
- Remark: If you want to add any additional information so you can write in the remark.
- Active: Checked (Yes) - Means available to use. Unchecked (No) - Not available to use.
- Action:
1. Edit- User can able to edit customer info.
2. Contact Info- Click on contact icon to add contact information.
3. Location- User can add location information.
Contact Info
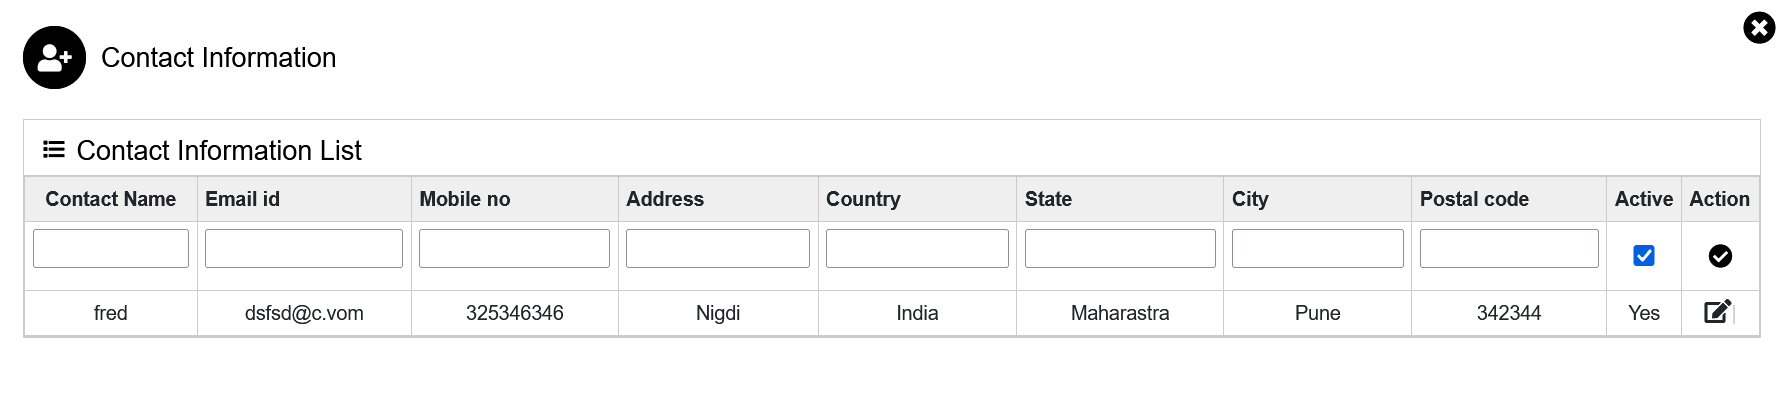
To add the contact information Click on contact icon which is in action column. It will open contact information list wizard dialog.
The various parts of the dialog are:
- Fill all data in empty fields like Contact Name, Email ID, Mobile No., Address, Country, State, City, Postal code.
- Active: Checked (Yes) - available. Unchecked (No) - Not available.
- Action: Save- Click save icon to save the information.
Edit- Click edit icon to edit the information.
Contact information will be added in the list.
Location
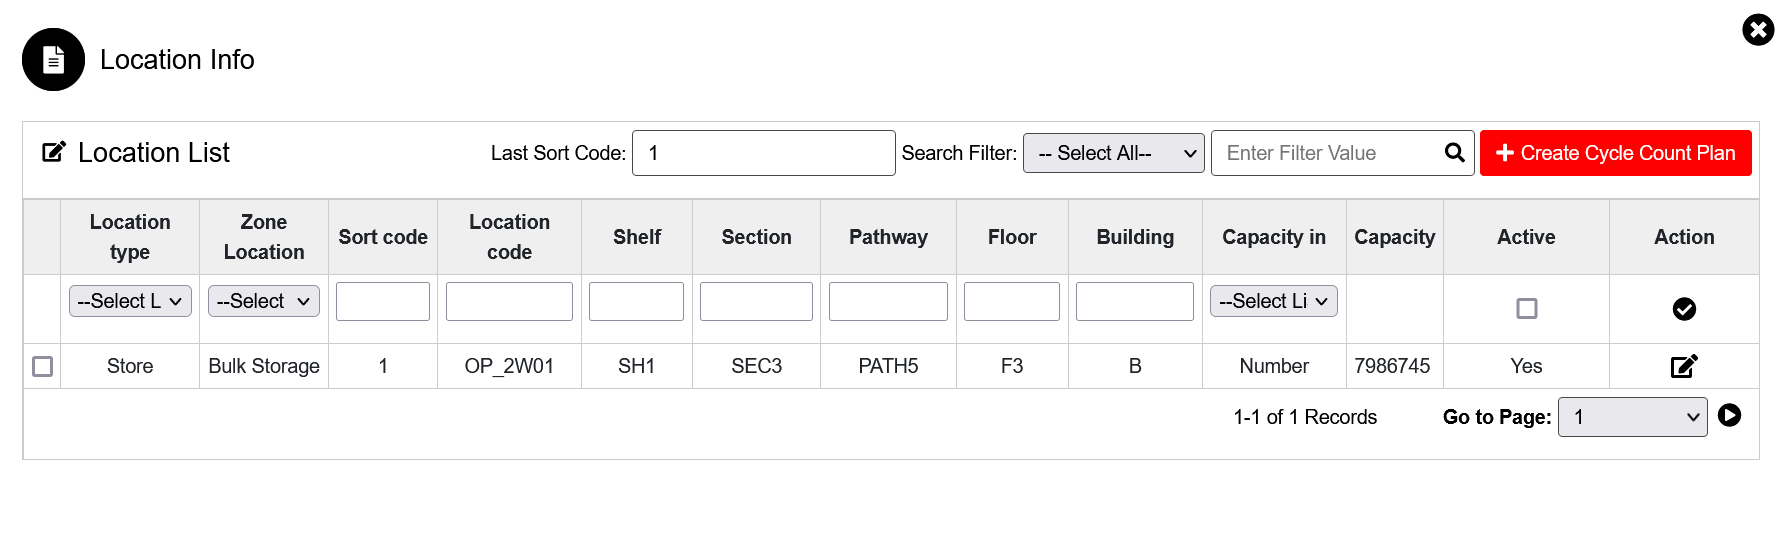
To add the location information Click on location icon which is in action column. It will open Location list wizard dialog.
The various parts of the dialog are:
- Last Sort Code: Display the latest sort code inserted.
- Search Filter: Search location by Location type, Zone location, Sort code, Location code, Shelf, Section, Pathway, Floor, and Building.
- Create Cycle Count Plan: To match System quantity with Warehouse it is done by Cycle count.
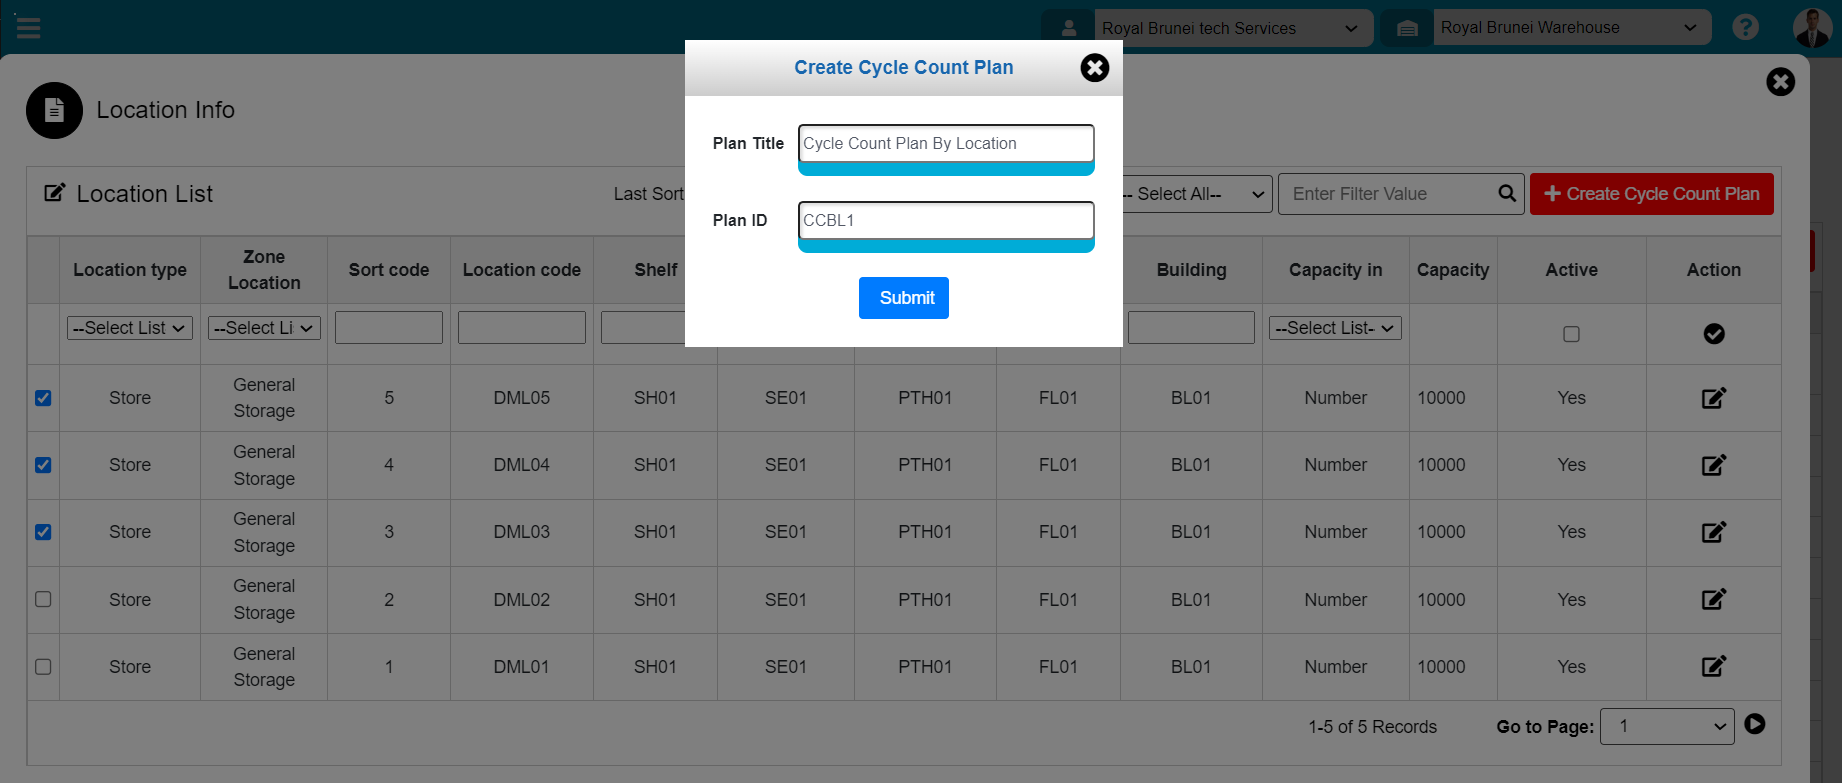
To create Cycle Count Plan by Location, use the "Administration" menu. This will open the Administrator wizard dialog and click on Warehouse Master Button then click the location icon against warehouse then click on Create Cycle Count Plan button.
The various parts of this dialog are:
- Before clicking on Create Cycle Count Plan button user need to select single or multiple location whose Cycle Count need to be perform
- Plan Title: Need to enter the Plan Title for the Cycle Count to perform location wise.
- Plan ID: Need to enter the Plan ID for the Cycle Count to perform location wise. This field value is unique.
- Submit. When click on Submit Cycle Count Plan for location will be created.
Cycle Count Plan created will display in Administration menu of Cycle Count Section.
- Location Type: Specify location type like store, Rejection, Loading, Unloading etc. - These are different type of location in warehouse.
- Zone Location: These are different type of zone in warehouse.
- Sort code: Using sort code nearest location is searched in warehouse.
- Location code: Name of the location.
- Shelf: Different shelf of section used to store goods in warehouses.
- Section: Different section of pathway used to store goods in warehouses.
- Pathway: Different pathway of floor used to store goods in warehouses.
- Floor: Different floor of building used to store goods in warehouses.
- Building: Different building name of warehouse.
- Capacity In: Unit of capacity used to store goods in warehouses.
- Capacity: Capacity of location.
- Active: Checked (Yes) - Means available. Unchecked (No) - Not available.
- Action: Save- Click save icon to save the information.
Edit- Click edit icon to edit the information.
Location information will be added in the list.
Created with the Personal Edition of HelpNDoc: Experience the Power and Simplicity of HelpNDoc's User Interface