Allocation
Outward-Allocation
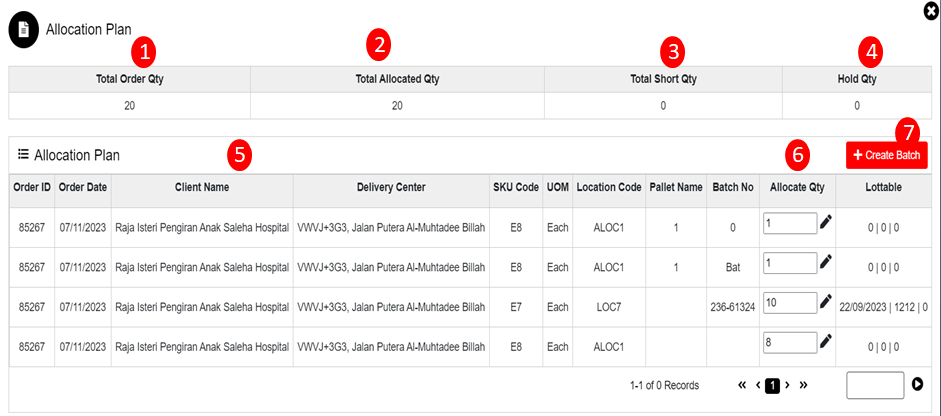
To create an Allocation Plan, use the "Outward" menu and select single or multiple orders whose batches is not created and click the "Allocation Plan" button. This will open the allocation wizard dialog.
The various parts of this dialog are:
- Total Order Qty: Must display the count of total order quantity.
- Total Allocated Qty: Must display the count of allocated quantity.
- Total Short Qty: Must display the count of short quantity whose stock is not present in warehouse.
- Hold Qty: Must display the count of hold quantity whose stock is hold in warehouse.
- Order Id, Order Date, Client Name, Delivery Date, SKU Code, UOM, Location Code, Pallet Name, Batch No, Allocate Qty, LOTTABLE should display for the selected SKU.
- Allocate Qty: Edit Allocate Qty button is used to edit the allocated qty from different location.
- Create Batch: When clicked on Create Batch button batch will be created for selected orders.
Batch will be created for selected orders and display in Outward Order List of Allocated section.
Allocation of Scrap Order
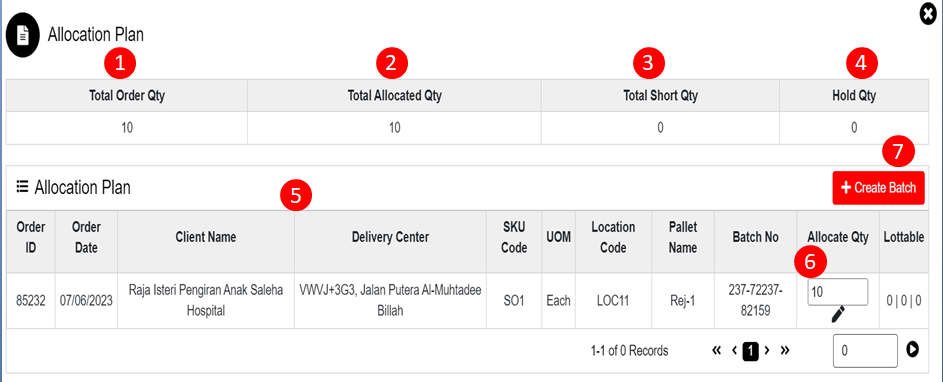
To create an Allocation Plan of Scrap Order, use the "Outward" menu and select Order Type as Scrap Order then select single or multiple orders whose batch are not created and click the "Allocation Plan" button. This will open the allocation wizard dialog.
The various parts of this dialog are:
- Total Order Qty: Must display the count of total order quantity.
- Total Allocated Qty: Must display the count of allocated quantity.
- Total Short Qty: Must display the count of short quantity whose stock is not present in warehouse.
- Hold Qty: Must display the count of hold quantity whose stock is hold in warehouse.
- Order Id, Order Date, Client Name, Delivery Date, SKU Code, UOM, Location Code, Pallet Name, Batch No, Allocate Qty should allocate from Rejection Location only, LOTTABLE should display for selected SKU
- Allocate Qty: Edit Allocate Qty button is used to edit the allocated qty from rejection location to different rejection location.
- Create Batch: When clicked on Create Batch button batch will be created for selected orders
Batch will be created for selected orders and display in Outward Order List of Allocated section.
Allocation Edit
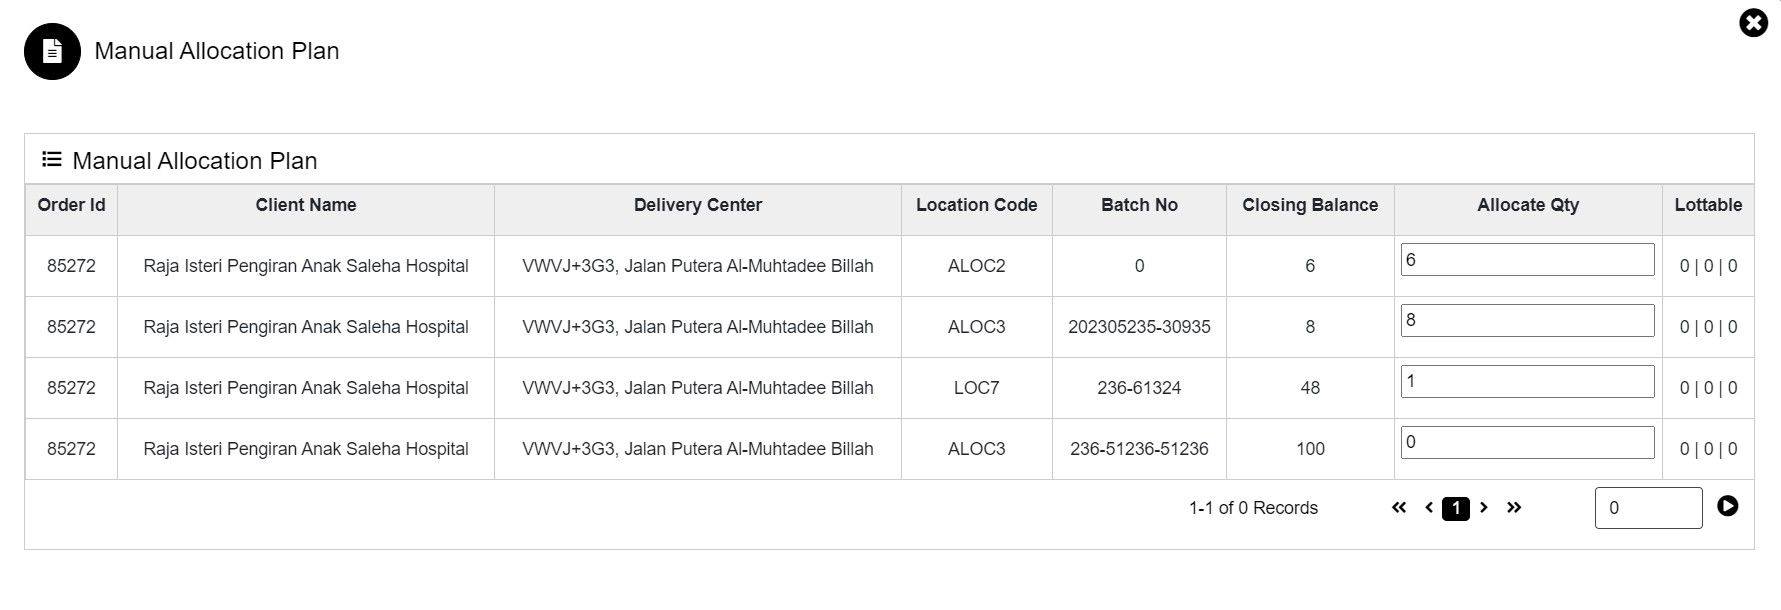
To perform Allocation Edit, use the "Outward" menu and select single or multiple orders whose batch is not created and click the "Allocation Plan" button and on Edit button, it will open the Manual Allocation Plan wizard dialog.
The various parts of this dialog are:
- Order Id: It is the order no.
- Client Name: Name of the Client.
- Delivery Center: Address of client.
- Location Code: Display location where SKU has been kept.
- Batch No: Batch No. of the order.
- Closing Balance: Display the quantity available in warehouse location wise.
- Allocated Qty: Display the allocated quantity against SKU location wise. User can change the allocated quantity from one location to another.
- LOTTABLE: Display the LOTTABLE of SKU if assigned, like Expiry Date, Batch No.
Allocated quantity will be updated for edited allocated quantity and display in Allocation Plan.
Created with the Personal Edition of HelpNDoc: Transform Your Documentation Workflow with HelpNDoc's Intuitive UI