User Master
User Master
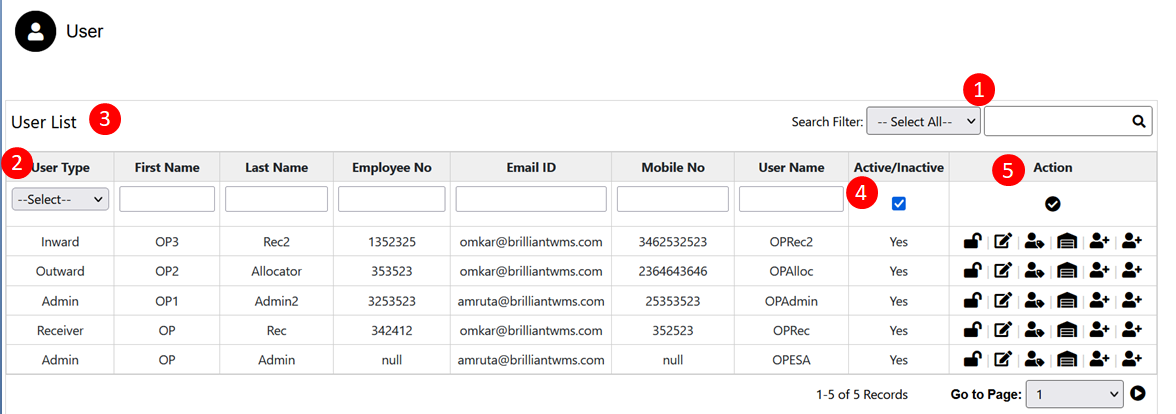
To create user, use the "Administrator" menu and click the "User Master" button. This will open the user list wizard dialog.
The various parts of this dialog are:
- Search Filter: Search User by User Type, First Name, Last Name, Employee No., Email ID, Mobile No., User Name.
- User Type: User types are-Super Admin, Admin, Warehouse Management, Inward, and Outward.
- User List: User List contains User Type, First Name, Last Name, Employee NO, Email Id, Mobile No, and User Name.
- Active/Inactive: If it is checked means user is available/Active, & if it is Unchecked Means User is not available/INACTIVE.
- Action: Action contains –Save, Lock/Unlock, Edit, Role Master, Add Warehouse, Add Customer, add Client
- Save: Click on save button to save the data.
- Lock/Unlock: If the 'Lock ICON' is lock means user can’t login again & if it is Unlock means user can login again.
- Edit: User can use this button to edit filled information.
- Role Master: User can assign the role to user from the drop-down as Admin,warehouse manager.As per selected role user should select the menus from list by clicking on action button.
- Add Warehouse: User can assign warehouse.For assigning warehouse user need to click on add warehouse from list & need to select the warehouse & click on submit button then the warehouse will display in the warehouse list.
- Add Customer: User can assign customer.
- Add Client: User can assign client.
Added User Data will display in User List.
Role Master
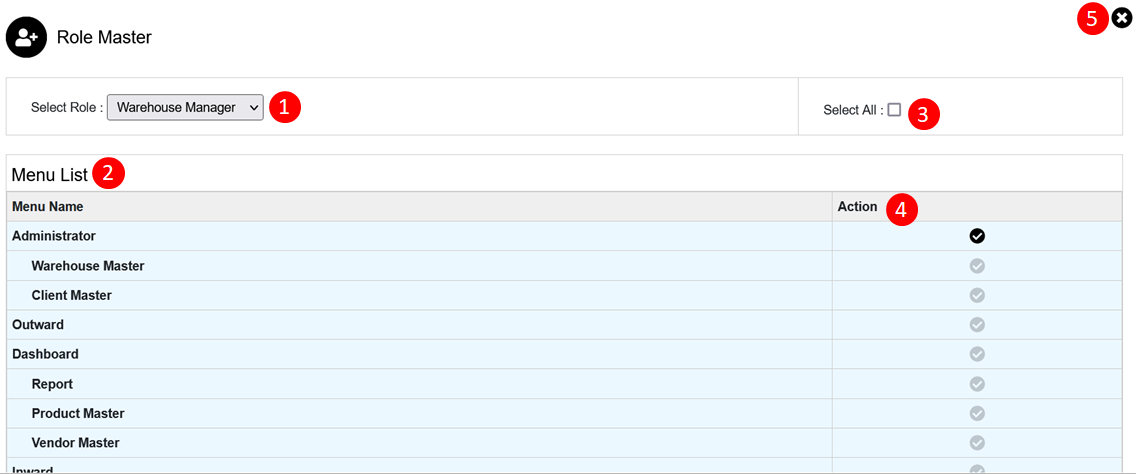
To Assign the roles click on Role Master select the role from dropdown. This will open Role Master wizard dialog.
The various parts of this dialog are:
- Select Role: Select the role.
- Menu List: Select the menu from the menu list to give the access of that menu to the user.
- Select all: If you want to give all menu access to the role you can select all roles by click on Select all.
- Save icon: Click on save icon to save the operation.
- Cross: Click on Cross icon to close the page.
Role will be assign to the user.
Add Warehouse
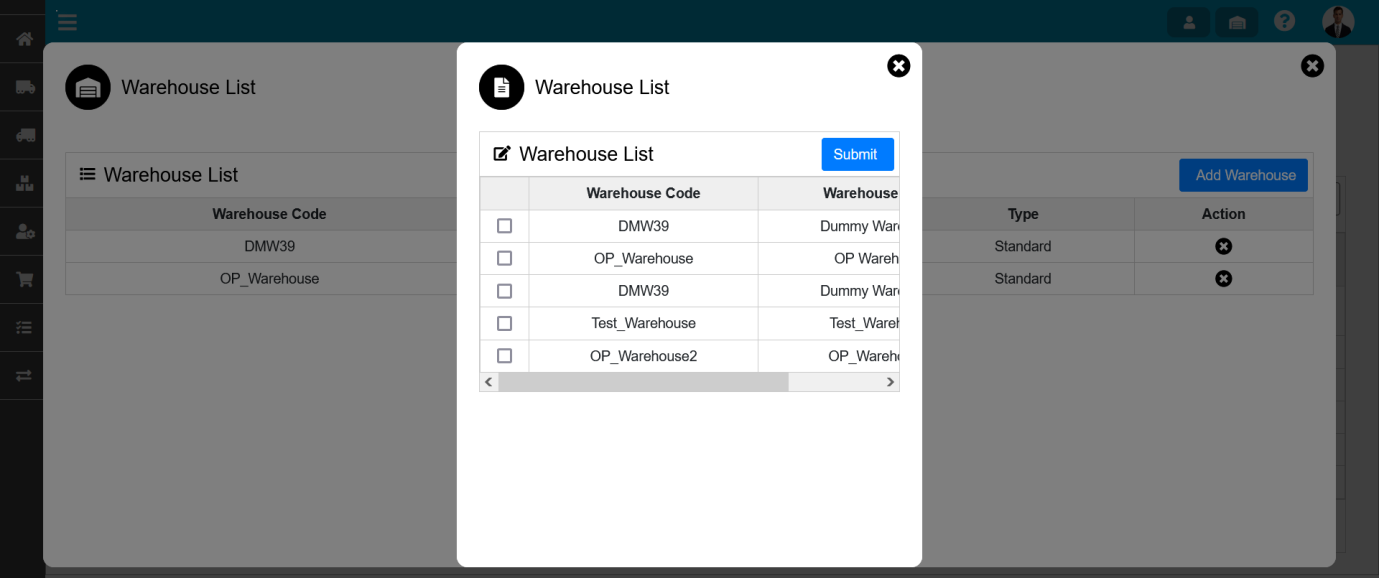
To add the warehouse, Click on Add warehouse icon This will open the Warehouse List wizard dialog. Select the warehouse and click on Submit Button.
The various parts of this dialog are:
- Warehouse List: Warehouse List contains Warehouse Code, Warehouse Name.
- Submit: Click on submit button to add the warehouse.
- Action: There is a cross icon you can remove the warehouse by clicking on Cross icon.
Warehouse will get assign to user.
Add Customer
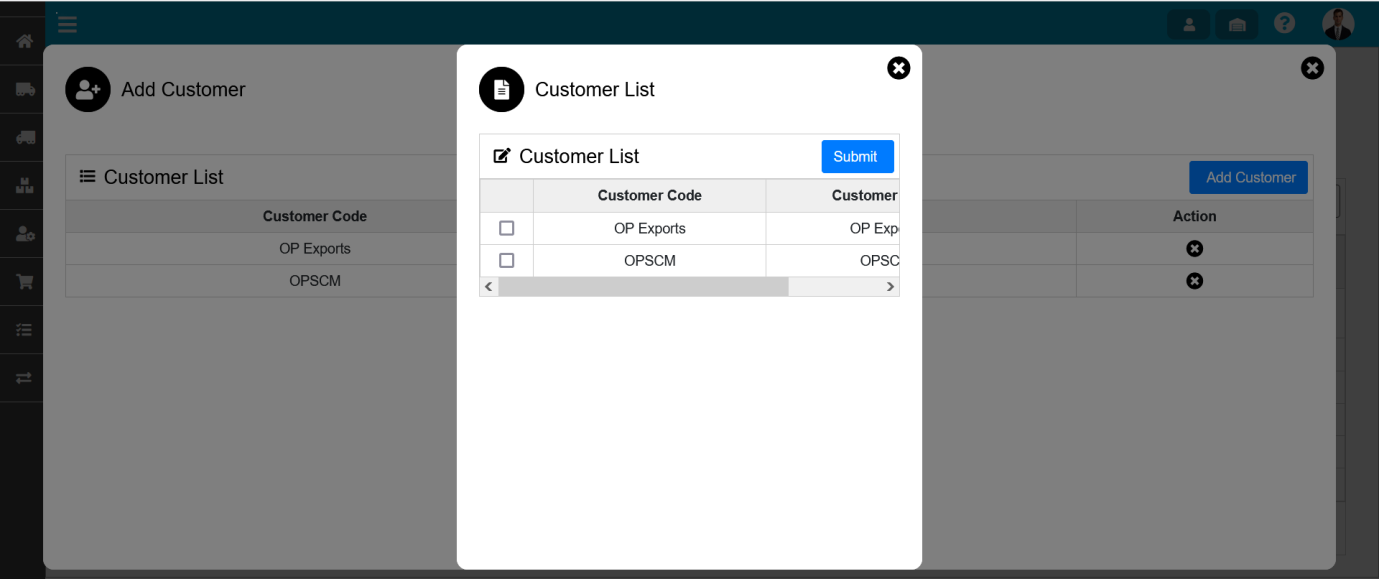
To add the Customer, Click on Add Customer This will open the Customer List wizard dialog. Select the Customer and click on Submit Button.
The various parts of this dialog are:
- Customer List: Customer List contains Customer Code, Customer Name.
- Submit: To add the customer.
- Action: There is a cross icon you can remove the added customer by clicking on cross icon.
Customer will get assign to user.
Add Client
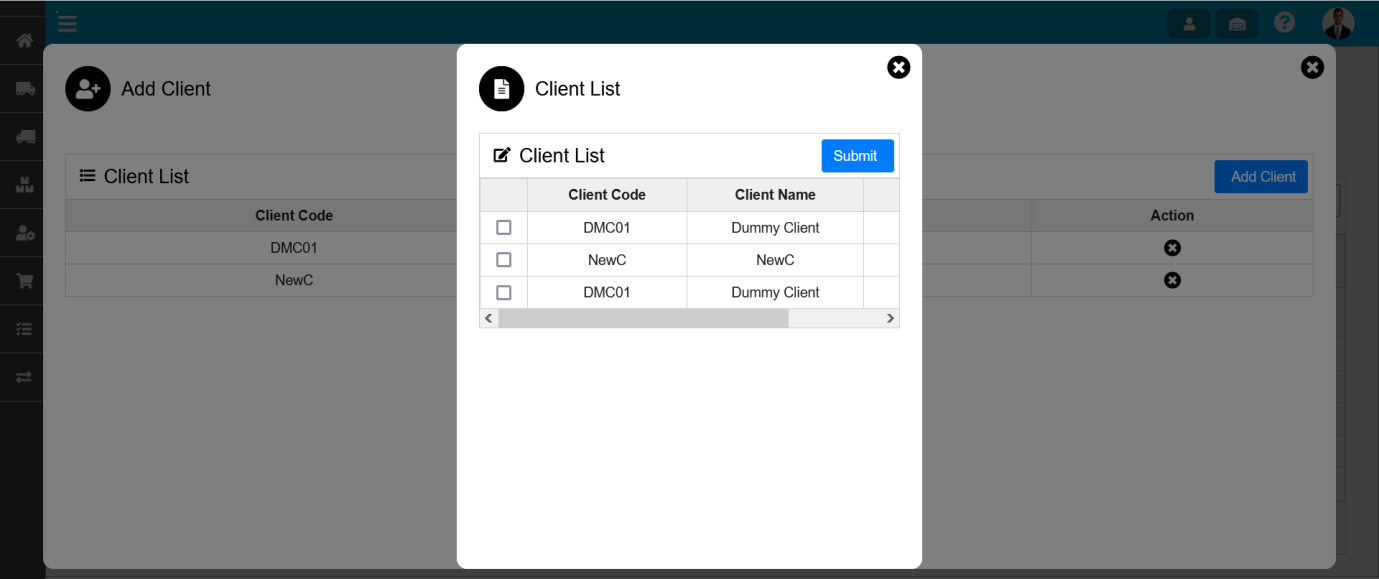
To add the Client, Click on Add Client icon.This will open the Client List wizard dialog. Select the Customer and click on Submit Button.
The various parts of this dialog are:
- Client List: Client list contains Client code, Client Name, SAP Code.
- Submit: To submit the client.
- Action: There is a cross icon you can remove the added customer by clicking on cross icon.
Customer will assign to selected user.
Created with the Personal Edition of HelpNDoc: Easily share your documentation with the world through a beautiful website