Import
Import
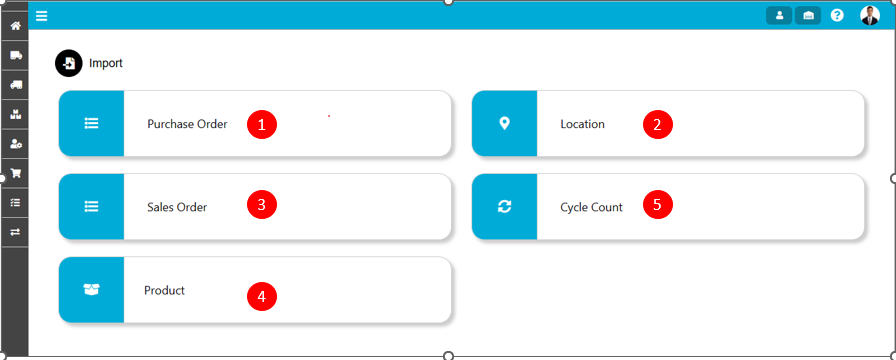
Import functionality is used to insert multiple records or entries at once. There are five types of import available in the system.
- Purchase Order
This import is used to insert or create Purchase orders on bulk level at once. When you click on the purchase order menu then import screen will display.
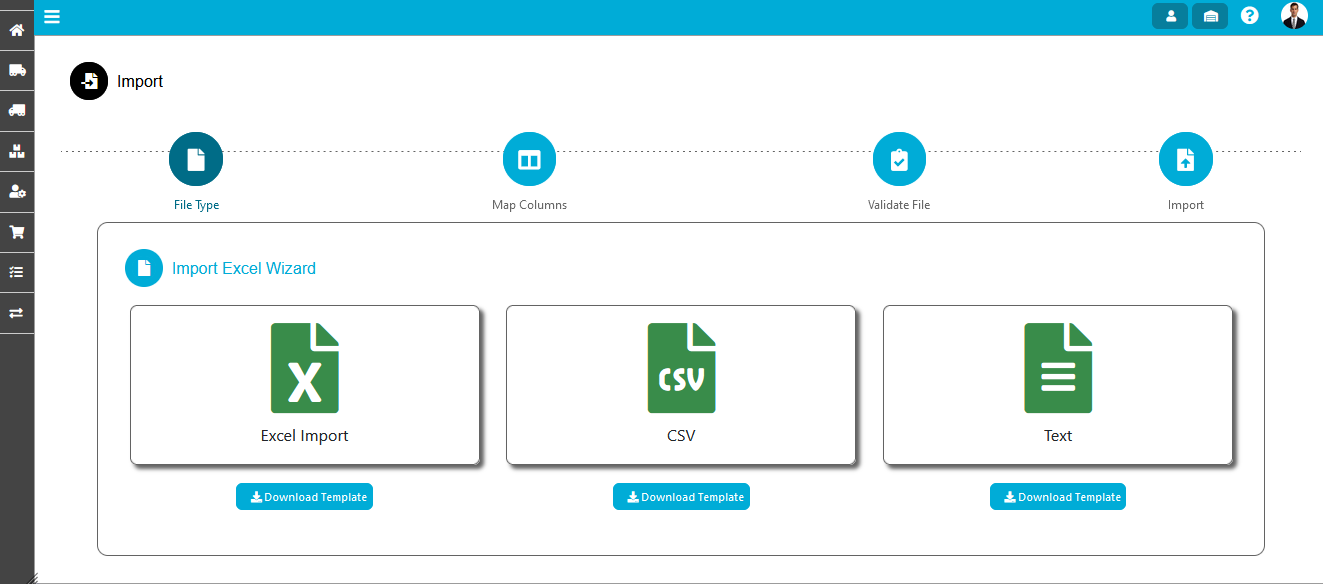
- The import screen shows various types of templates user can able to upload in above mentioned format for example (Excel, CSV, and Text)
- Click on Download template suppose you clicked on Download template of excel Import then system will download the excel format.
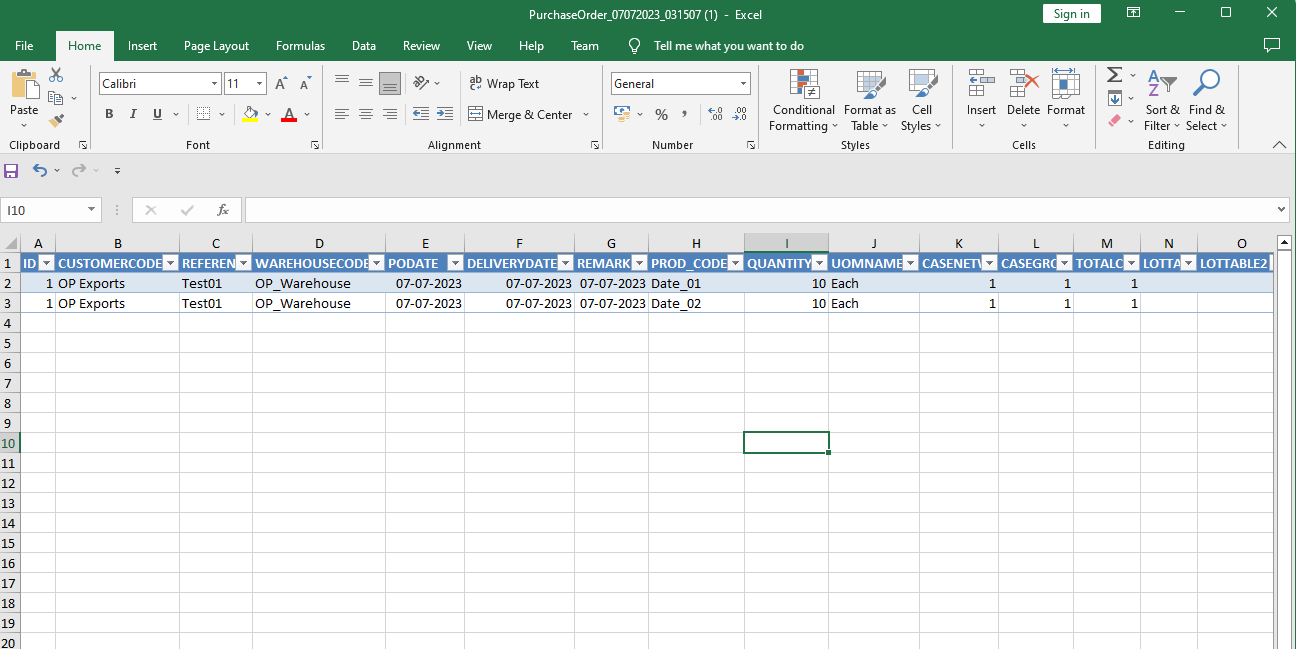
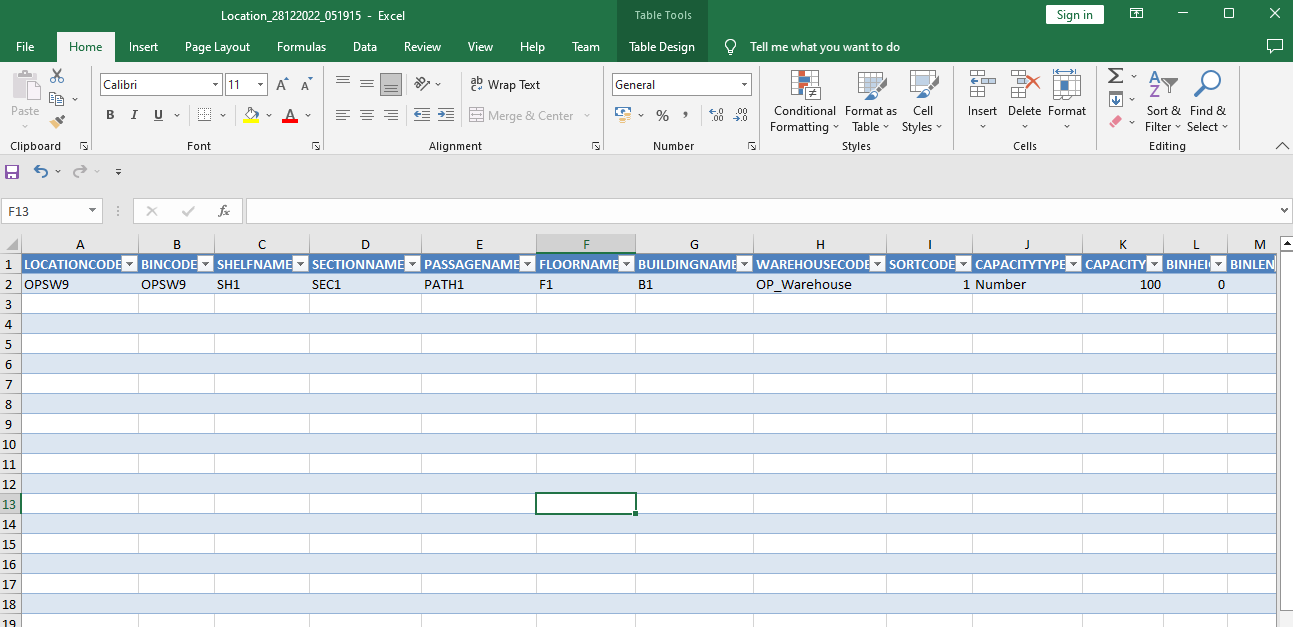
- Open that downloaded Excel file , fill all Mandatory fields and save the Excel file.
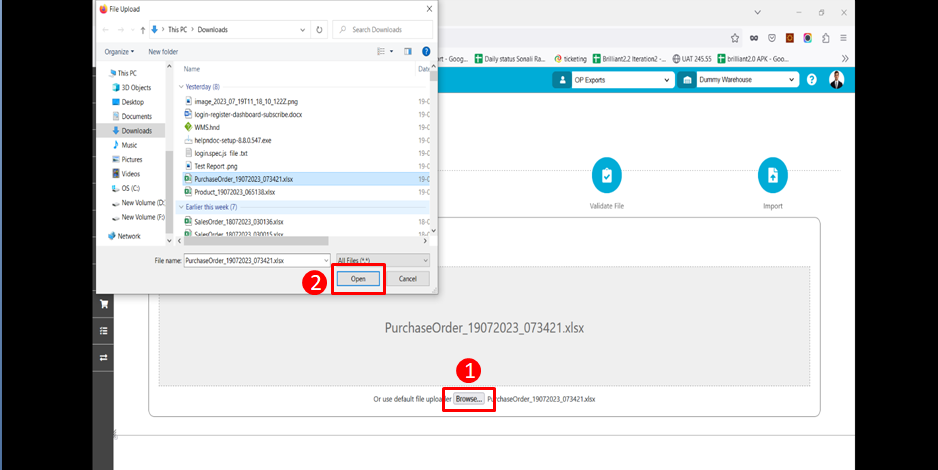
- Go again to Import screen and click on the Excel import symbol.
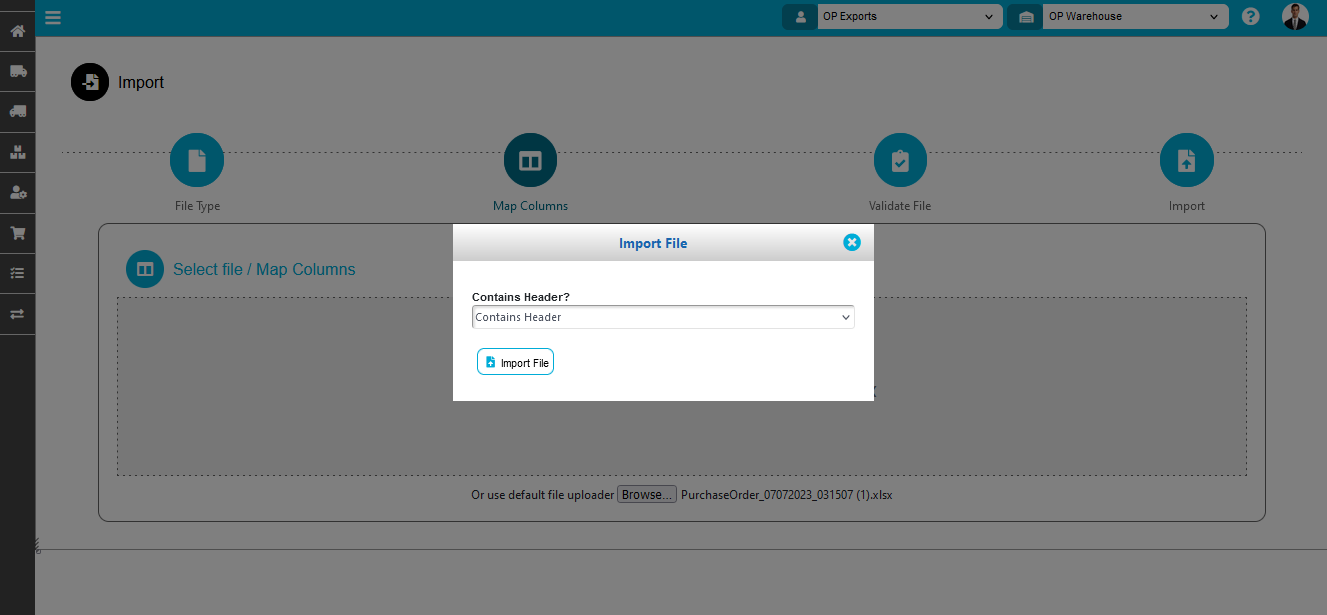
- A new screen will open where click on the Browse option.
- Now select the file you created for the order then click on the open button
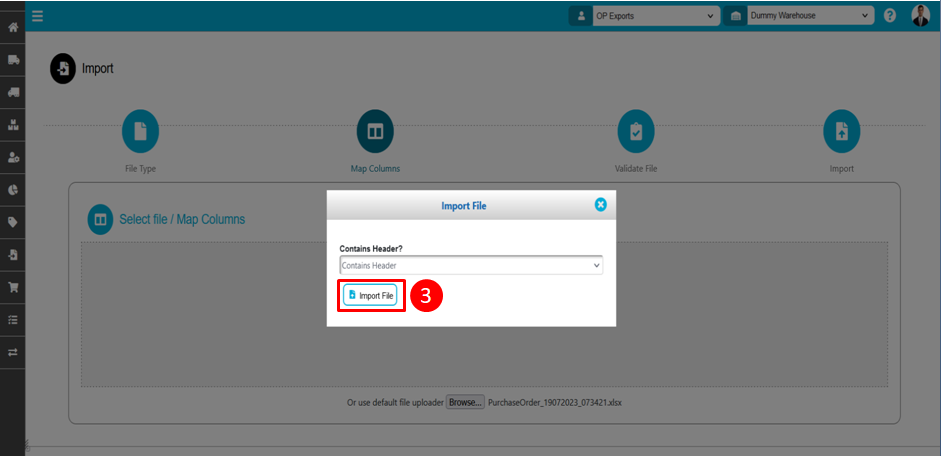
- Then the file gets bind and click on the Import file button then we are headed to next operation.
- Here all the template headers and data headers will match and make data equally distributed to their specified field. Click on Map header button.


- Then system will validate all the data imported If data contains error then system will display the row count in total error.
- User can edit the error contain rows.For editing user need to click on the total error tab then system will show all rows then clicking on column which are having error user can correct the wrong values.
- If data is not having error then directly click on the upload button.
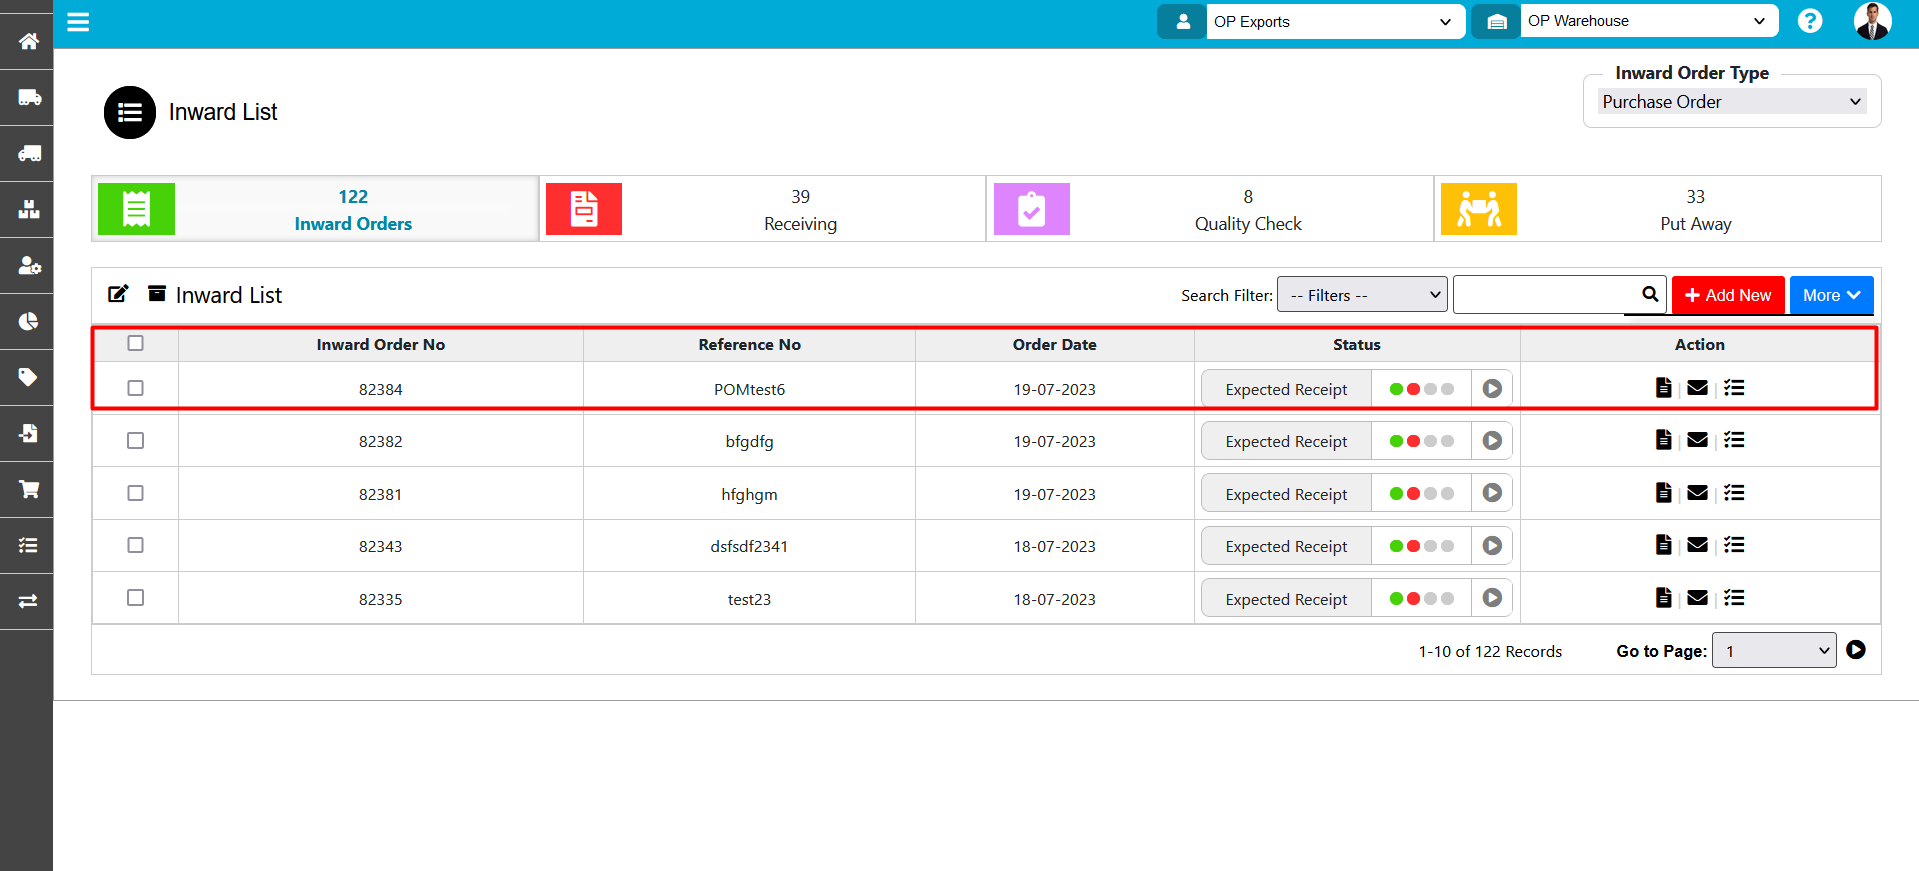
- Then all the records gets uploaded to the system and the Purchase order will be created. click on the finish button to get exit from import menu.
- Then Orders will display in inward list.
- Location Import
This import is use to insert or create Locations on bulk levels at once. When you click on the Location menu the import screen will display.

- The import screen shows various types of templates user can able to upload in above mentioned format for example (Excel, CSV, and Text)
- Click on open template suppose you clicked on excel template then system will download the excel format.
- Open that downloaded Excel file, fill all mandate fields and save that Excel file.
- Go again to Import screen and click on the Excel import symbol.
- A new screen gets opened where click on the Browse option.
- Now select the file and click on a location file and then click on the open button
- Then the file got bind and click on the Import file button then we go to next operation.
- Here all the template headers and data headers will get validated to their specified field(This check the Columns in Order sheet which is been Uploaded have same number of columns which is in the Default Template). Click on Map header button.
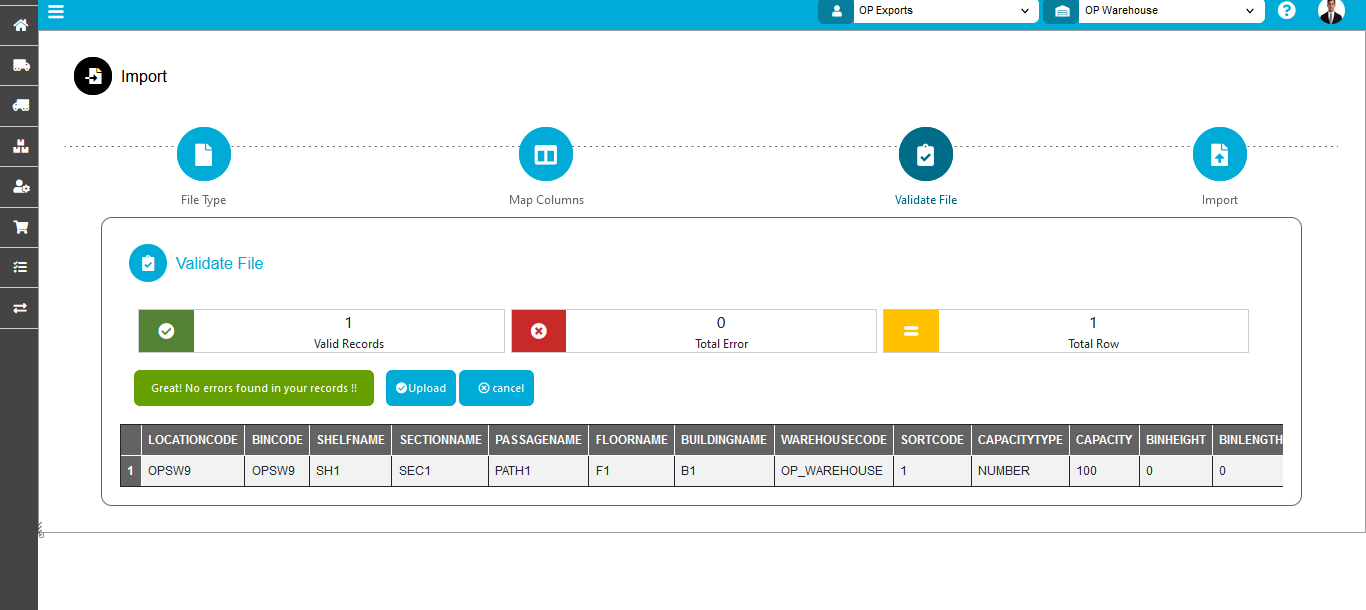
- After that all data got validated by the system and it showed a message as No error in template so we can proceed further. Then click on the upload button
- Then all the records are got uploaded to the system and the location got created in a mentioned warehouse now click on the finish button to get exit on import.
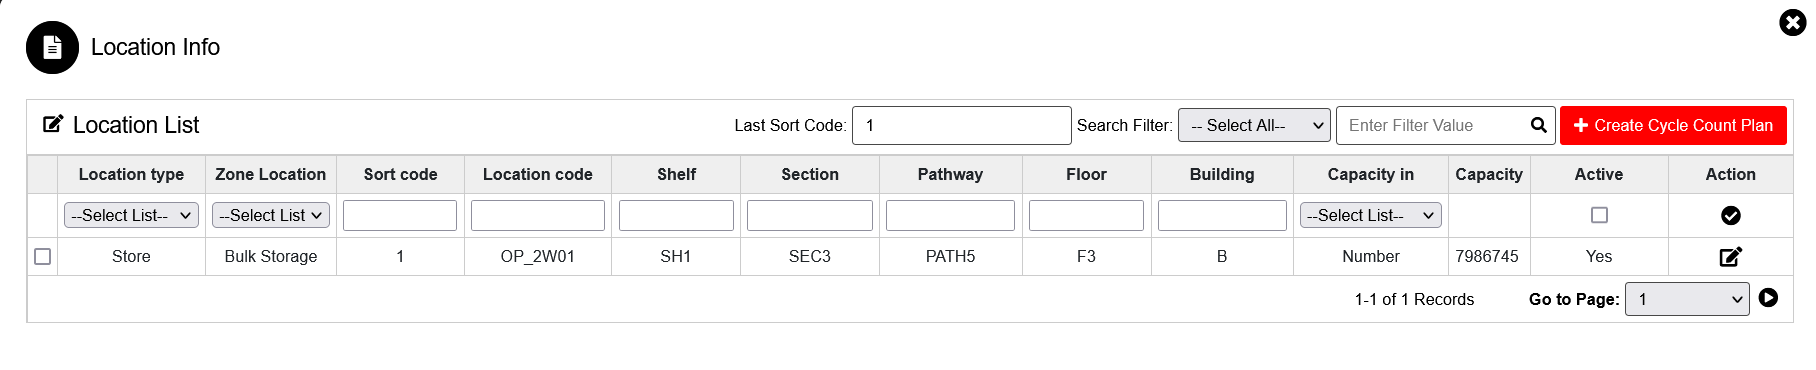
- After completing import the location will display in warehouse master click on location menu then the location will display.
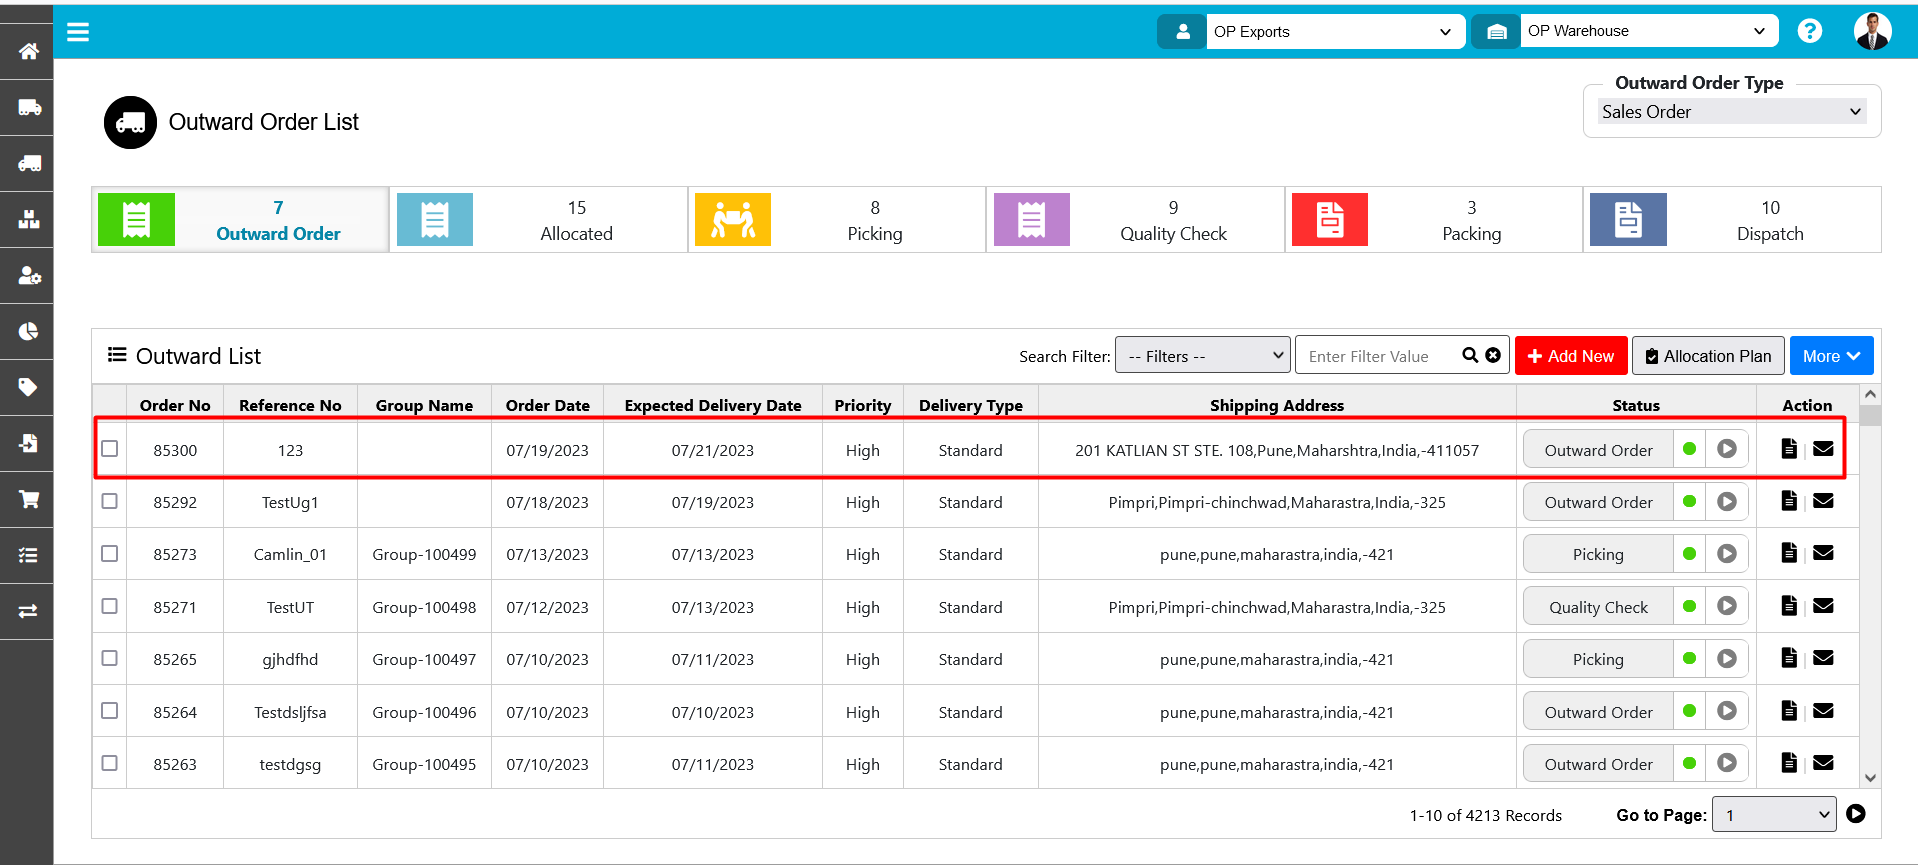
- Sales Order
This import is used to insert or create Sales orders on bulk level at once. When you click on the Sales order menu the import screen will display.

- The import screen shows various types of templates user can able to upload in above mentioned format for example (Excel, CSV, and Text)
- Click on open template suppose you clicked on excel template then system will download the excel format.
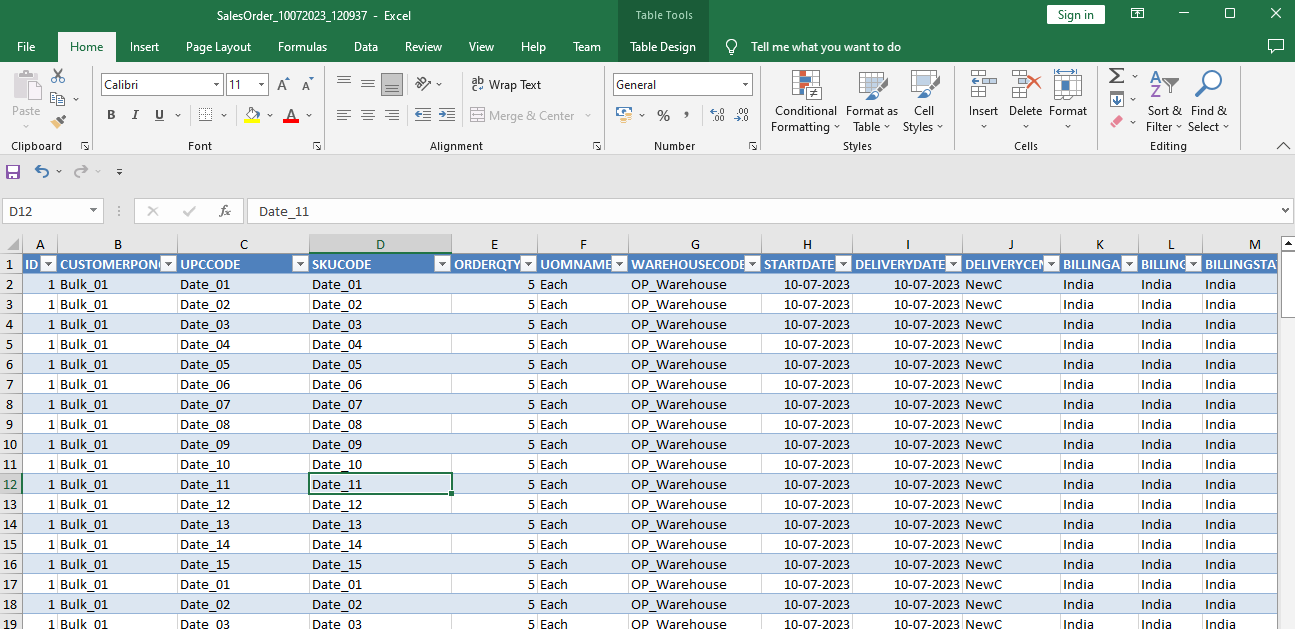
- Open that downloaded Excel file , fill all mandate fields and save that Excel file.
- Go again to Import screen and click on the Excel import symbol.
- A new screen is opened where in that screen click on the Browse option.
- Now select the file and click on sales order file and then click on the open button

- Here all the template headers and system headers are matching with each other
- Here all the template headers and data headers will get validated to their specified field(This check the Columns in Order sheet which is been Uploaded have same number of columns which is in the Default Template). Click on Map header button.
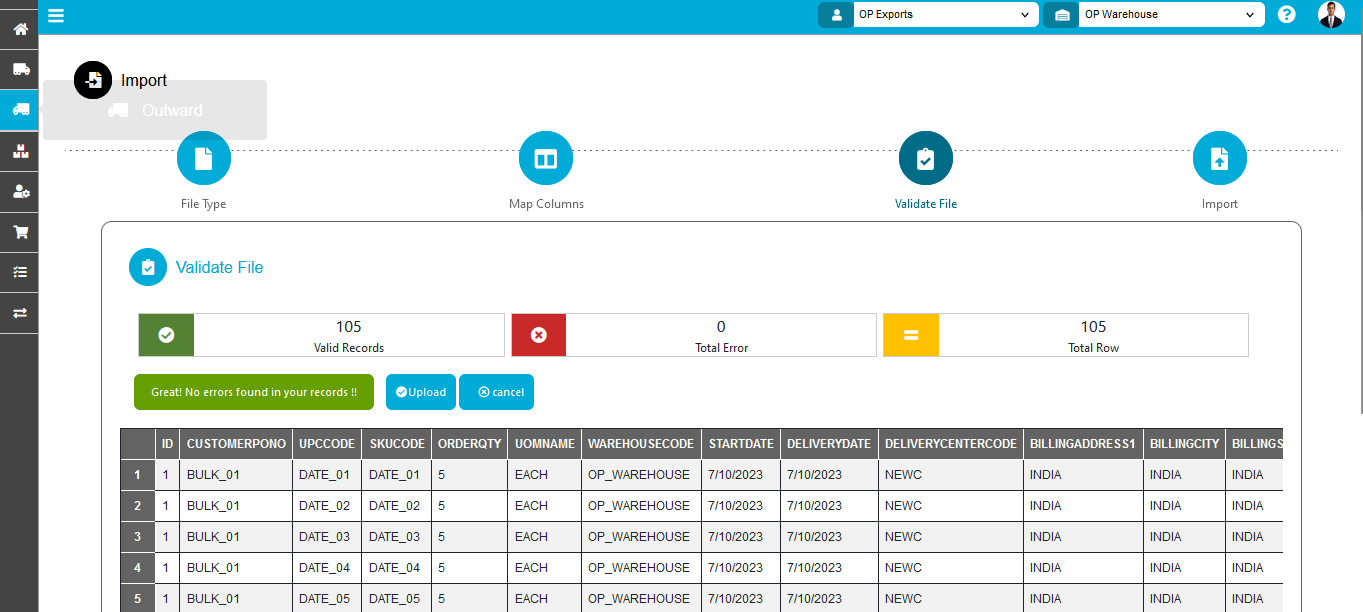
- After that all data got validated by the system and it showed a message as No error in template so we can proceed further. Then click on the upload button
- Then all the records gets uploaded to the system and the sales order is created. Now click on the finish button to get exit from import.
- After completing import, orders will get displayed in outward list.
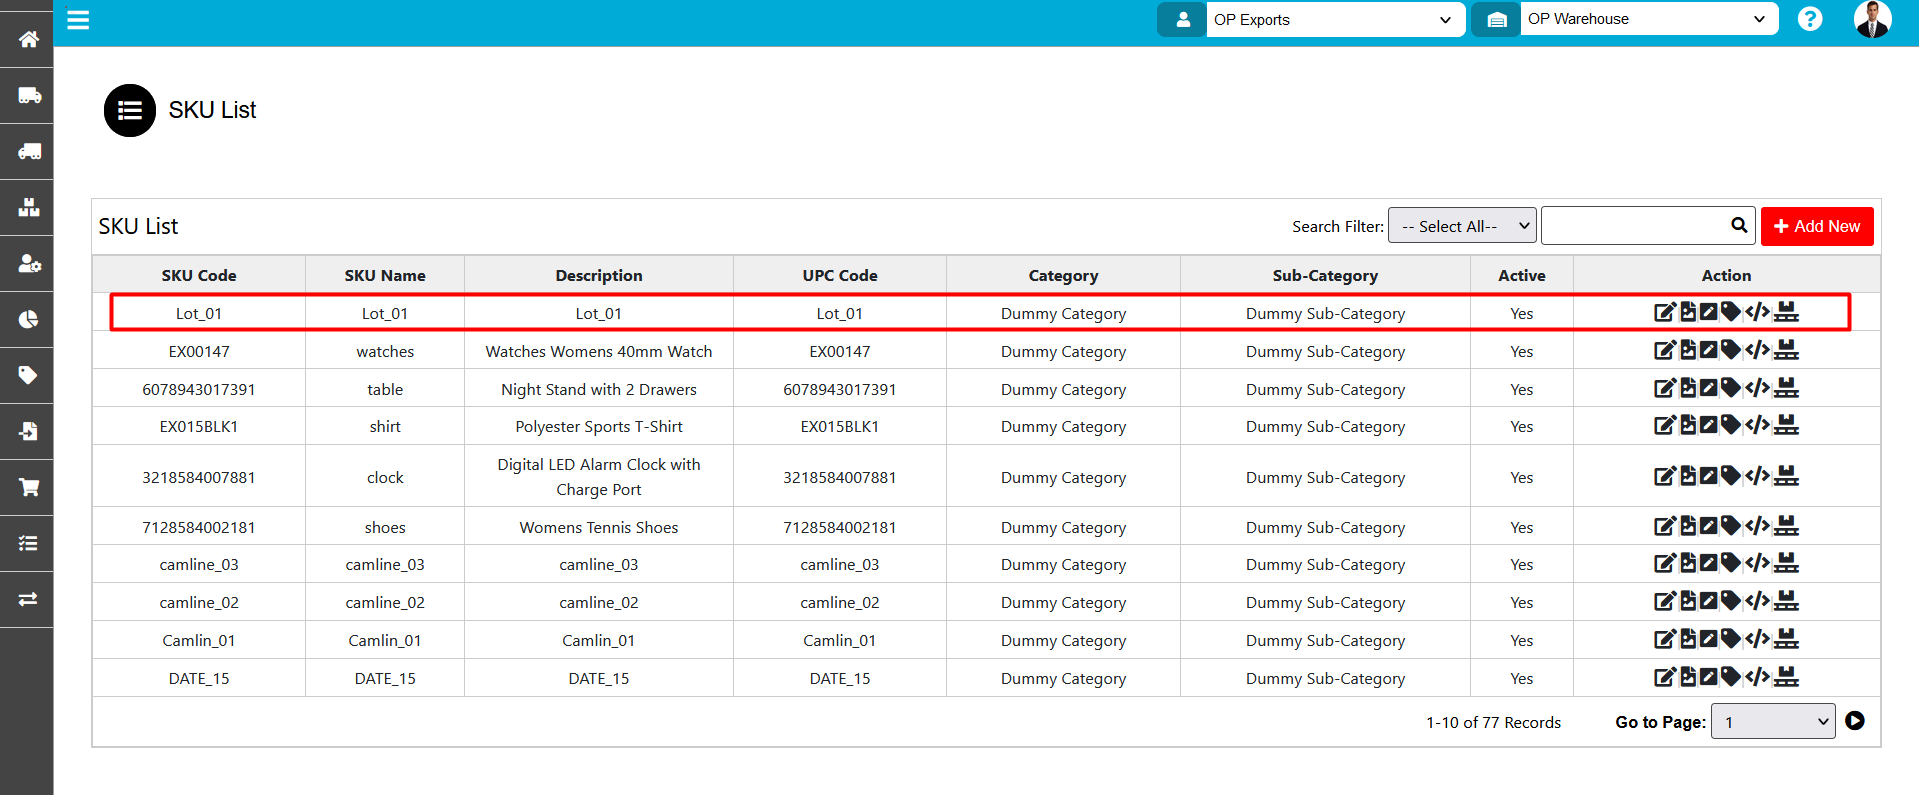
- Product
This import is used to insert or create Products at a bulk level. When you click on the Product menu the import screen will display.

- The import screen shows various types of templates user can able to upload in above mentioned format for example (Excel, CSV, and Text)
- Click on open template suppose you clicked on excel template then system will download the excel format.

- Open that downloaded Excel file, fill all mandate fields and save that Excel file.
- Go again to Import screen and click on the Excel import symbol.
- A new screen is opened where click on the Browse option.
- Now select the file product file you created and then click on the open button

- Here all the template headers and data headers will get validated to their specified field(This check the Columns in Order sheet which is been Uploaded have the same number of columns which is in the Default Template). Click on Map header button.
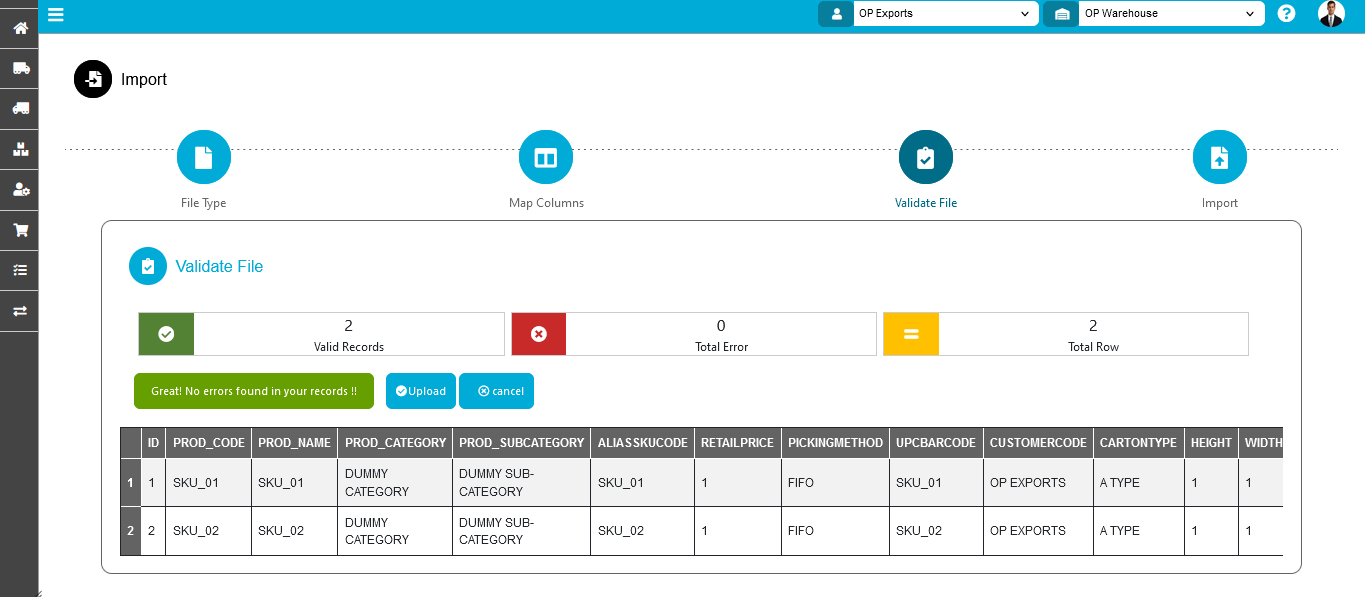
- After all data gets validated by the system and it showed a message as No error in template so we can proceed further. Then click on the upload button.
- Then all the records gets uploaded to the system and product will get inserted into the system.now click on the finish button to get exit from import.
- After completing import the SKU's will get displayed in SKU master.
- Cycle count
This import is used to check the actual quantity of mentioned product in the warehouse. When you click on the Product menu the import screen will display.

- The import screen shows various types of templates user can able to upload in above mentioned format for example (Excel, CSV, and Text)
- Click on open template suppose you clicked on excel template then system will download the excel format.
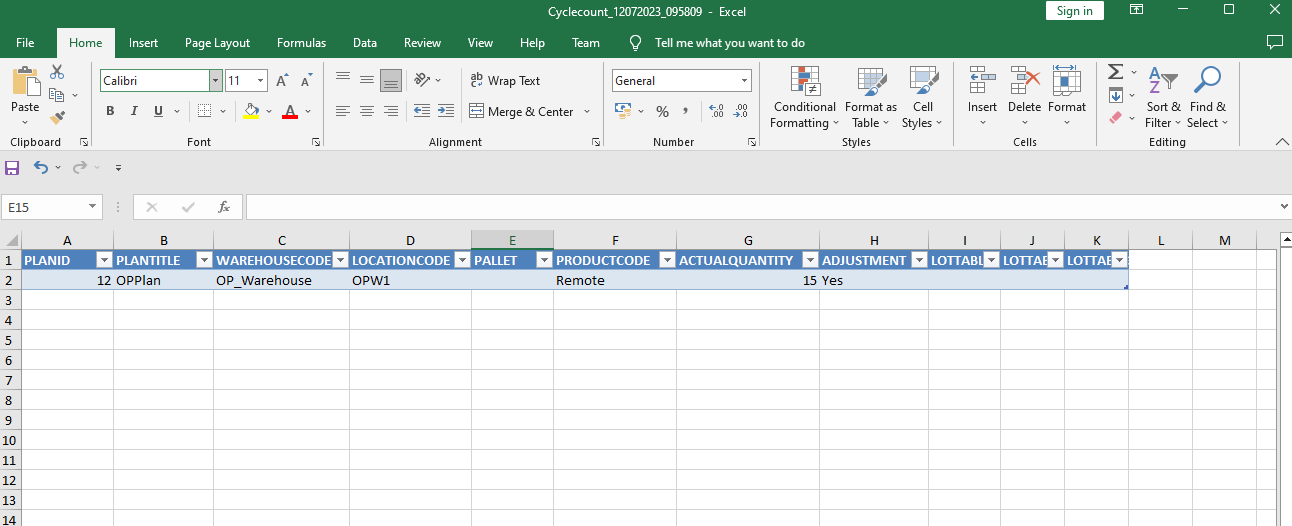
- Open that downloaded Excel file, fill all mandate fields and save that Excel file.
- Go again to Import screen and click on the Excel import symbol.
- A new screen gets opened where click on the Browse option.
- Now select the file and click on the Cycle count file and then click on the open button

- Here all the template headers and data headers will get validated to their specified field(This check the Columns in Order sheet which is been Uploaded have the same number of columns which is in the Default Template). Click on Map header button.
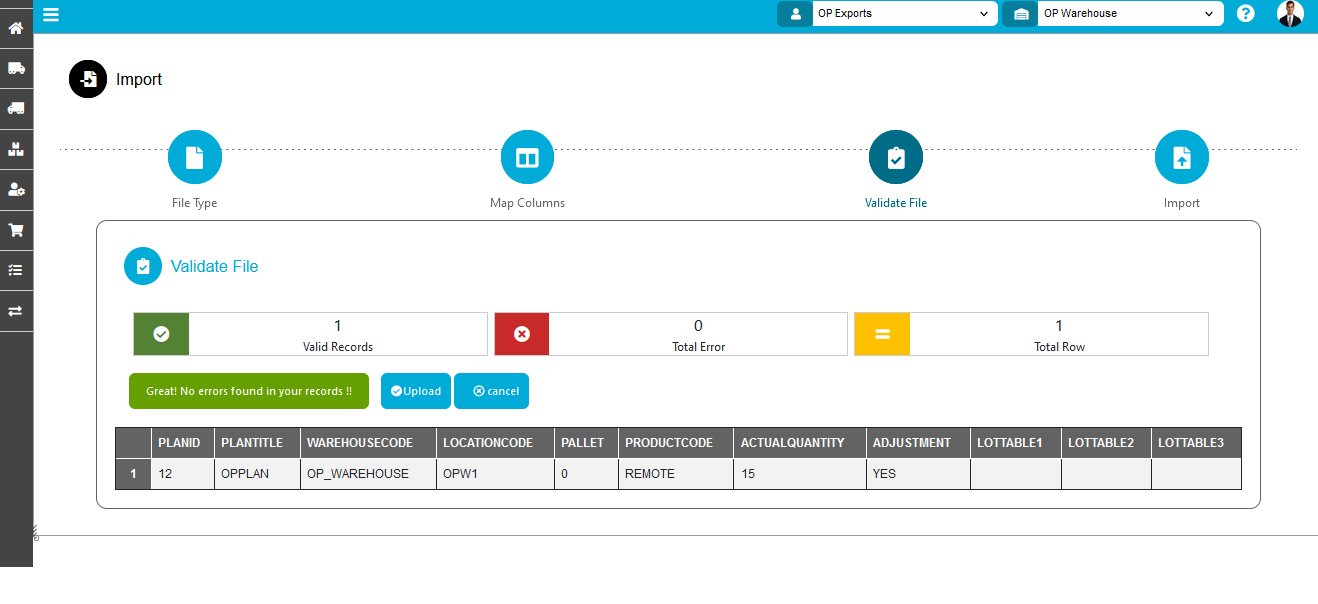
- After all data gets validated by the system and it showed a message as No error in template so we can proceed further. Then click on the upload button.
- Then all the records gets uploaded to the system and the records is inserted & cycle count plan will be created into the system now click on the finish button to get exit on import.
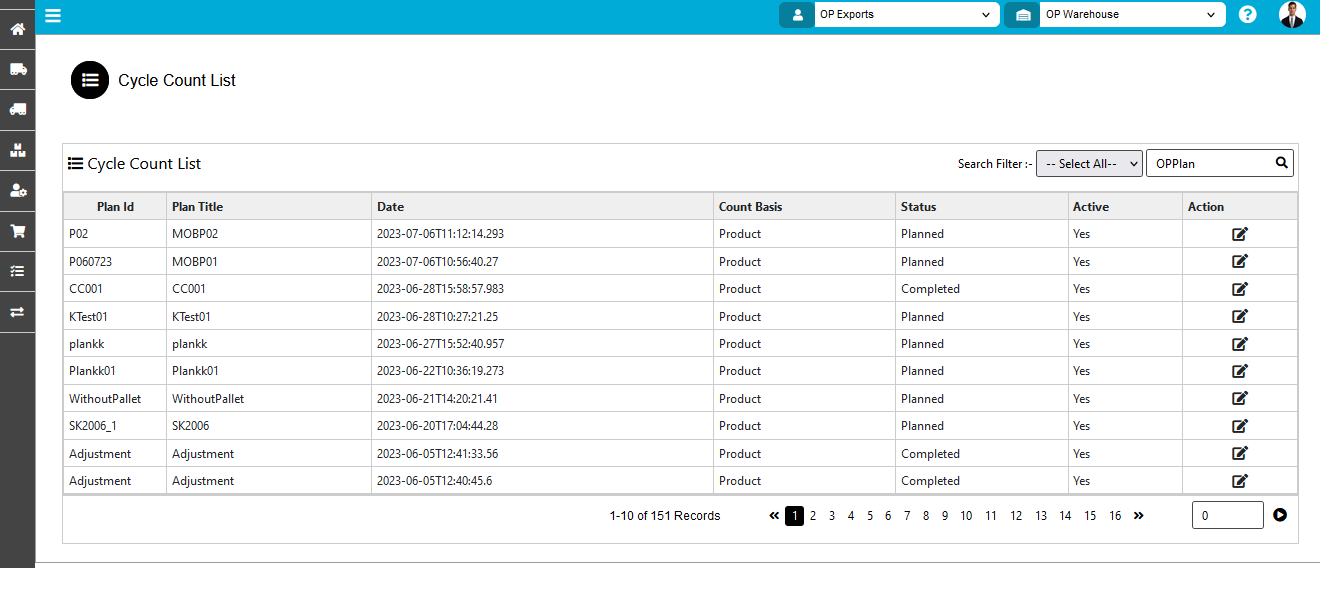
After completing import the Cycle count record gets inserted in the Cycle count list.
Created with the Personal Edition of HelpNDoc: Transform Your Word Doc into a Professional-Quality eBook with HelpNDoc